Andalusian Gazpacho

I made several trips to Spain the year I was an au pair in Germany. I had a good friend from college au pairing in Madrid and a couple of other friends teaching English in southern Spain, oh and there was a hen weekend to Barcelona in there too! One of the trips I did started in Malaga, and wound up through Andalusia stopping in Granada, and smaller towns like Cabra and Antequera, making my way up to Madrid.

Among the many memorable things from the trip is a meal that my friend (who I was visiting) and I had in Antequera, a meal prepared for us by and in the home of the director of the school my friend worked for, a meal I’ll never forget. She so easily whipped up a shockingly simple and delicious lunch including an amazing gazpacho simply of tomato and bread, and she delivered some of the best fried artichokes I’ve had. I have remembered it all this time and it’s funny to go back to my blog from that year and see how the soup they made is exactly what I saw in this month’s Spain issue of Food & Wine magazine.

From Adventures in Deutschland: “they made us this amazing Andalusian soup thing for lunch. It is raw tomatoes blended with some garlic, pepper, olive oil, vinegar and bread. It is eaten kind of like soup, and you dip a lot of bread in it as well…”

From Food & Wine: “Salmorejo is a classic soup made primarily with tomatoes and bread. It’s best with a splash of sherry vinegar, but Andalusian tomatoes pack a good hit of acidity, so they often omit it in Spain.”

Yum Yum.

Obviously after all the Spanish inspiration in the September issue, I now want to have a Spanish dinner party, but for now I’ve started with this soup as a way of using my pounds of tomatoes that just keep coming. It’s refreshing and spicy with the raw garlic, and so so smooth, this ‘soup’ is hard not to love. I topped it with a corn & poblano salad/salsa and a poached egg, which was delicious. I loved the contrast that the texture of the raw veggies provided against the creaminess of the soup. I made it in the morning and let chill to have the whole thing for lunch. It took me right back to Spain and got me so excited about traveling, trying new foods and the endless tomato possibilities that await.


Salmorejo (Andalusian Gazpacho), serves two (originally from Food & Wine) Continue reading

Spring Crostini with Burrata, Snap Peas and Asparagus

Oh Spring! It’s when the farmers’ markets start to get exciting: berries, peas, asparagus, artichokes… the bounty is plentiful and I so enjoyed going this past weekend. I was reminded of what a nice way it is to start my Sundays and how much fun it is to be inspired by seasonal offerings when creating a meal. I had signed up to bring an appetizer to dinner club, and was originally going to make stuffed mushrooms, but when I saw what was at the farmers’ market I knew right away that I would be changing my dish.

A while back I had a similar appetizer to this at The Tipsy Pig and was inspired to try it on my own. I’m pretty sure there was mint and some salad mixed in, which would be a nice twist to this dish as well, and I was further reminded this was a good combination of flavors, when Bon Appetit featured a recipe for Snap Pea Salad with Burrata from April Bloomfield in the May issue. I was pretty sure that I couldn’t go wrong making these Spring crostini with out using a specific recipe.

They were a HUGE success. Everyone at dinner club loved them (because let’s be honest, who doesn’t love something with burrata on it?!) and I loved them too. If you don’t know already, burrata is mozzarella with a cream and cheese mixture inside the ball. In this dish it is the perfect creamy texture and rich flavor against the crispness of the toasts and fresh veggies. Next time I would use a little more balsamic reduction and maybe rub a little raw garlic on the toasts when they come out of the oven, but for the most part, the simplicity and freshness of this dish is what makes it amazing.

crostini

Spring Crostini:

  • 2 smallish handfulls snap peas
  • 1/2 bunch asparagus
  • 4-6 scallions, thinly sliced or mandolined, white and light green parts
  • 2 tablespoons finely chopped oregano (or mint, if that’s your thing)
  • 2 tsp olive oil
  • salt and pepper to taste
  • 1/4 cup balsamic vinegar
  • 12 slices baguette, sliced on the diagonal
  • 1 ball of burrata

Snap off the end of the peas, and slice diagonally into 3-4 slices. Cut through the outer shell and peas all in one. Snap of fibrous ends of the asparagus and blanch in boiling water for 1 minute unit bright green and barley tender. Slice into 1 inch pieces on the diagonal.

Mix peas, asparagus, thinly sliced scallions and oregano. Drizzle with olive oil and season with salt and pepper to taste.

Simmer balsamic vinegar in a shallow pot or pan, until it starts to thicken slightly. I just used a couple of tablespoons because it was all I had, and it only took a couple of minutes. I don’t imagine it would take that long for 1/4 cup, but keep an eye on it!

Place baguette slices on a baking sheet. Bake or broil until lightly toasted, approx 3-4 min on each side. The dinner club oven was set at 400 and I did 4 minutes on each side, so really you can just pop in with whatever you are already cooking for dinner- if you have garlic, you could cut a clove in half and rub the cut end on the warm toasts when they come out of the oven. This is common practice with most bruschettas and would have been a great added flavor here.

Cut the burrata into 12 wedges. Place one wedge on each crostini. I left the creamy side up so I could press the peas/asparagus on and they would stay. Top with pea/asparagus mixture. Drizzle with balsamic reduction, to taste. Season with more salt if needed.

Roasted Carrot Soup

Pureed soups continue to be one of my favorite things to make at winter time. They are so easy, always loaded with flavor and obviously soup is comforting when it’s rainy and blustery outside. This carrot soup is no exception.

This past week, I found some time to cook on a week night (shocking, I know!) and absolutely loved the way it turned out. You have a creamy slightly sweet hot soup, countered with the tart bite of cold yogurt and the crunch and smokiness of the dukkah spice mixture. You simply roast carrots in the oven, then blend with broth, heat through and you’re done. I have made butternut squash soup many a time before and while I love that, I did love how this was sweet without being overly so, and that you can mix as much or as little of the yogurt and spice into each bite.

It’s just the right way to warm and spice up a cold night.

IMG_3201IMG_3209

Roasted Carrot Soup, adapted from Bon Appétit here

  • 1/2 cup unsalted, shelled raw natural pistachios
  • 2 tbsp sesame seeds
  • 2 tsp ground coriander
  • 2 tsp ground cumin
  • 1 tsp kosher salt plus more
  • Freshly ground black pepper
  • 2 pounds carrots, peeled, cut into 1-inch pieces (about 6 larger carrots)
  • 1/2 white onion, largely chopped
  • 2 tbsp unsalted butter, melted
  • Freshly ground black pepper
  • 1 quart vegetable broth
  • Low-fat plain Greek yogurt

Preheat oven to 425. Place the carrots and onion on a rimmed baking sheet. Drizzle with melted butter, season to taste with salt and pepper, and toss to coat. Roast until the carrots are tender and just beginning to brown, about 25 minutes. Let the carrots cool slightly.

While carrots are roasting, toast pistachios in a dry skillet over medium-high heat, until golden brown about 6 min. Remove from pan, return to heat. Toast sesame seeds, coriander and cumin 1-2 min until fragrant. Transfer to bowl with pistachios,  add 1 tsp salt and freshly ground pepper. When cool, transfer to mortar and pestle and corsely grind.

Transfer carrots and onions to a blender with broth and blend until very smooth. You may need to do it in 2 batches. When smooth transfer to a medium saucepan and heat through.

Serve soup with a dollop of yogurt in the middle and sprinkle with the dukkah spice mix.

Stuffed Squash Blossoms

I’ve wanted to try making stuffed squash blossoms for a while now. I picked some up at the farmers market last year, but didn’t quite get around to fixing them up, not to mention I was slightly intimidated by the thought of deep-frying them. I saw them again this year and thought I’d give it a go. We have a ‘doughnuts’ chapter coming up for The Breakfast Book project so I figured I’d better try my hand at frying before that next chapter.

And you know what? It really wasn’t that bad! I bought a thermometer, kept the oil at temperature, and it all worked out. The greatest part is that my stuffed blossoms were AMAZING. I loved the crispness from the tempura-like batter and the ricotta center was a delightful, creamy contrast to the exterior. The blossoms are really just a vessel with minimal taste to themselves, so it’s important to have the right in (and out) sides.

I consulted a couple different recipes, and one had parmesan in addition to ricotta and another added lemon zest, I think both would be great additions. I’d also love to try them again with a melty-er, stringy-er cheese – I’ve had a couple different varieties in restaurants and they are all good. While you have to be a little delicate with the flowers as you’re filling them, these are definitely worth the little bit of effort – oh, and the tomato sauce is SO amazing. The slightest kick from red pepper flakes, and pure tomato goodness, it’s the perfect summer combination.

Stuffed Squash Blossoms with Tomato Dipping Sauce

Tomato Sauce:

  • 1 garlic clove, minced
  • 1/4 teaspoon hot red pepper flakes
  • 2 tablespoons olive oil
  • 1 1/2 pound tomatoes, chopped
  • 1/2 cup water
  • 1/2 teaspoon sugar

Heat oil in pan, add garlic and pepper flakes. Cook for about 30 seconds until garlic is light brown. Add rest of ingredients, and 1/2 tsp of salt. Simmer uncovered for 25-30 min until thick, stir occasionally.

Squash Blossoms:

  • 1 cup whole-milk ricotta (preferably fresh)
  • 1 large egg yolk
  • 2 tbsp cup finely chopped mint
  • 2/3 cup grated Parmigiano-Reggiano, divided
  • 12 to 16 large zucchini squash blossoms
  • 1/2 cup plus 1 tablespoon all-purpose flour
  • 3/4 cup chilled seltzer or club soda
  • About 3 cups vegetable oil for frying

Stir together ricotta, yolk, mint, 1/3 cup parmesan, and 1/8 teaspoon each of salt and pepper.

Carefully open each blossom, remove stamens, and fill with ricotta filling, gently twisting end of blossom to enclose filling. (You may have filling left over.)

Whisk together flour, remaining 1/3 cup parmesan, 1/4 teaspoon salt, and seltzer in a small bowl.

Heat 1/2 inch oil to 350°F in a 10-inch heavy skillet. When the oil is hot, dip the blossoms in batter to thinly coat. Fry coated blossoms, turning once, until golden, 1 to 2 minutes total. To maintain the temperature, you may need to do a few batches, so you don’t crowd the pan. Transfer with tongs to paper towels to drain. Season with salt. Serve with tomato sauce.

Original Recipe here

Bastille Day: Moules à la Marinière

Happy Bastille Day! I know it seems a bit odd of a holiday to be celebrating, but this day will always hold a special place in my heart because it is my parents’ wedding anniversary. 33 years (that’s right, 33 years!) ago today, my parents tied the knot, which was just the beginning of a long-lasting, loving relationship and inspiration.

Billie Jean and Russell back in the day

My mom is a high school librarian and my dad is retired, so they have the pleasure of taking an immense summer vacation every year. The typically road trip. Through Spain, through the south east US, and this year, through eastern Canada. With stops in Montreal, Quebec and Prince Edward Island. PEI is very well known for their mussels and I was a bit disappointed when my dad said he didn’t have any there. While I’m not the hugest shellfish fan, I have developed a love for these little suckers over the years.

So with Bastille Day, my parents’ trip to PEI, and my upcoming trip to France later this summer as the inspiration for my weekend feast with my sister, I turned to Julia Child and the book I shamefully have never cooked from. I wanted something simple, light and easy for our mid-day meal, so when my eyes fell on Moules à la Marinière (mussels steamed in wine and herbs) I knew I’d found it. A one pot meal oh so appropriate for the holiday, the anniversary and my vacation day dreams.

This recipe was amazingly easy and super delicious. I couldn’t believe that when I opened the pot after just five minutes I had actually created mussels, that they actually opened, and that they actually tasted like they would in a restaurant. The flavorings are simple and let the shellfish shine through, and the serving liquid (a combination of white wine and mussel juices) was divine. I highly recommend giving this a try because I know you will be just as pleasantly surprised as I was at the results.

Moules à la Marinière* (serves 2)

  • 1.5-2 lbs fresh mussels**
  • 1 cup white wine
  • 1/4 cup minced shallots
  • 4 sprigs flat leaf parsley
  • 3-4 sprigs thyme
  • 1 garlic clove, minced
  • 1/2 bay leaf
  • fresh ground pepper
  • 3 tbsp butter

Melt the butter in a large pot, add the shallots and garlic, cook for a few minutes to soften. Add herbs and pepper cook for 30 seconds or so to release flavors. Add wine and bring to a boil. Boil for 2-3 minutes to cook off the alcohol and reduce volume slightly.

Add mussels and cover tightly. Boil over high heat for about 5 minutes until shells are open and mussels are done. During the five minute cooking time, frequently (every minute or so) grasp the pot, thumbs clamped to hold on lid and give a quick toss to mussels, up and down motion, so they change levels and cook evenly.

When done, ladle mussels into shallow soup bowls, and ladle liquid over. You can let the liquid settle for a minute, if you are worried about sand (the sand will settle on the bottom while resting). Enjoy!

** Scrub mussel thoroughly and remove and ‘beards’ between the shell halves. Soak them in water for 1-2 hours  so they will disgorge sand and lose a bit of the saltiness. FYI floaters are ok – about half of my mussels floated in the soaking water, while the others sank. They were all tightly closed still, but opened up while cooking. Discard and open non-cooked mussels, or any non-opened cooked mussel, as these are bad.

* recipe slightly adapted from Julia Child’s Mastering the Art of French Cooking

Sweet Potato Bread

So often I feel like I am bad about letting things go to waste. On occasion there are things in my CSA box that I just don’t manage to squeeze in, or I make too much for one person and have to toss things that aren’t consumed in time (or more likely, I chuck out the rest of what I’ve made that not good for me, because were it to remain in my house I would eat copious amounts of it and either a) get sick b) fat – yes, I’m still working on self control). This past weekend though, I decided to take full advantage of having leftovers and made a sweet potato bread with mashed sweet potatoes I had previously taken to dinner club.

Scallops were on the dinner club menu, so I made a bed of sweet potatoes for then. I added butter, cream, and just touches of brown sugar, lemon and chili, and while the overall result was rich it was also relatively mild – making them the perfect addition to some sort of other dish. I wanted to go a totally different direction with then, so I found a pumpkin bread recipe and subbed the canned pureed pumpkin ingredient with my potatoes. It worked out delightfully and ended up being the perfect breakfast on a cold rainy morning.

The bread was light and not as dense as a pound cake, super moist and had subtle notes of ginger, which I really enjoyed. There was a great crust from the massive amount of sugar in the recipe and yet the bread itself was not overly sweet. I doled out slices to friends (in an effort to not waste, yet again) and the feedback was that it didn’t even make it 24 hours before being gobbled up.

I hope you’ll take some inspiration the next time you have some leftovers and try to think outside the box (or pan) about what else they may be able to do for you. You’d be surprised at just how versatile your dishes can be!

BEFORE

AFTER

Sweet Potato Bread*

  • 4 tablespoons unsalted butter, softened
  • 1 3/4 cups all-purpose flour
  • 1/2 teaspoon fine salt
  • 1 teaspoon baking soda
  • 1/2 teaspoon baking powder
  • 1 teaspoon ground cinnamon
  • 1/2 teaspoon ground nutmeg
  • 1/4 teaspoon ground allspice
  • 1/4 teaspoon ground ginger
  • 1 1/2 cups sugar
  • 1/4 cup vegetable oil
  • 1 cup sweet potato puree (or left over mashed sweet potatoes)
  • 2 large eggs

Preheat the oven to 350°F. Butter or spray a 9-inch loaf pan with cooking spray (I also lined mine with parchment, spraying the pan and the paper).

Mix together the flour, salt, baking soda, baking powder, cinnamon, nutmeg, allspice, and ginger in a small bowl.

Beat the butter, sugar, and oil on high speed until light and fluffy, about 1 minute – scrape down the bowl a couple times.

Add the pumpkin puree, mix until combined. Add the eggs, one at a time, and mix until just incorporated. Mixing on low speed, slowly add the flour mixture and 2/3 cup water and mix until just combined.

Spread the batter into the prepared pan and bake until a toothpick inserted into the center comes out clean, 1 hour to 1 hour 15 minutes. Let cool in the pan for 10 minutes. Remove from pan and let cool completely.

*Recipe very slightly adapted from Bobby Flay recipe here

Game Day: Elevated Pigs in a Blanket

Um, these are kind of amazing, no no, like really amazing. As much as I love gourmet food and making things from scratch, there are some oldies but goodie that are pretty fantastic as is – add a couple of extra ingredients and they just might blow you away. I’ve been in love with lil’ smokies in a blanket since I made them for a 70’s party several years ago (I went with a snack from the era) and since then I’ve made them for many a house party because they are so easy and such a crowd pleaser. The thing that makes these great for hosting is that you can tuck in the piggies ahead of time, keep them on baking sheet in the fridge and pull out when you are ready to bake. I also love how this particular recipe doesn’t need a dipping sauce, so they are clean and easy for game day viewing.

What makes these elevated is the home-made spicy mustard, apple and sharp cheddar. The apple, cheese, meat combo is a classic that I’ve applied here and here. I am a huge fan of how the lil’ smokies and crescent roll are slightly sweet and are balanced by the crisp apple and the sharpness of the cheddar and mustard. Also, if you are wondering why I went crescent roll over puff pastry for my special smokies – I just think they taste better. I like the bread texture, and I think they maintain texture and flavor better than puff when cooled. When rolled all together these little piggies are hot, melted  and I know everyone will love them.

{cut each crescent roll in half and spread with spicy mustard}

{layer on thinly sliced apple and cheese – don’t slice too thin because they need to hold their own against the sausage and the roll}

{add the lil’ smokie – it looks high, but it’s so worth it}

{wrap ’em up tight, bake with the apple on the bottom}

{bake on parchment paper at 375 for 12-15 min until golden and melted}

Braided Sausage Roll

Hostess: Could you bring an appetizer?
Me: Sure! I’ll bring my braided sausage roll.
Hostess: Wow! Braided? Sounds fancy.
Me (thinking to myself): Muahaha, if she only knew how easy it is…

This braided sausage roll the ultimate item you can bring to or serve at a party – something that looks very impressive, but is really not to difficult to put together. It is another one of my favorites from the holidays, as there are many parties to attend and people to impress. If the pictures aren’t enough to make you want to whip out the pastry roller, you’ll be happy to know the filling is delicious too! It’s almost sweet with apple and cheddar to balance out the mild spiciness of the sausage and the sage is earthy and screams of winter. I go packaged on the puff pastry, obviously (I am not a miracle worker) and it all comes together a little bit crispy and a little bit melt in your mouth.

You’ll have to give this a try – and experiment with fillings too. I have provided some pictures with tips and tricks, to make it easy for you to impress your next guests.

Braided Sausage Roll:

  • 1 lb mild italian sausage
  • 1 medium onion, finely chopped
  • 1 garlic clove
  • 1 3/4 cups apple peeled and grated, about 2 smallish apples, lightly squeeze out excess juice
  • 3/4 cup cheddar cheese
  • 2 tsp sage
  • 1 tsp cumin
  • salt and pepper to taste
  • 1 package puff pastry (2 sheets)
  • egg wash (1 beaten egg + some milk)

– Heat some oil in a pan, cook onion until translucent. Add garlic and sausage. Brown until sausage is cooked through. Drain any excess fat.

– Transfer sausage mixture to a bowl and add the rest of the ingredients, mix until evenly distributed.

– Roll out both puff pastry sheets to 15×10 inch in size, transfer to pastry sheets lined with parchment paper. Cut sides, place sausage in the middle and braid (see below).

– Brush with egg wash and bake at 400 degrees about 35 min until browned and bubbly.

The braiding:

Tip: Roll out the puff pastry and transfer it to the baking sheet THEN cut the strips. You will have one heck of a time transferring if you cut or fill and braid if you’re not already on the baking sheet.

As easy as it looks, just one over the other, alternating sides, all the way down

Tip: you might have to cut off the last strip of dough on each side at the end to make sure it folds up pretty.

Leek and Goat Cheese Tart

I adore leeks. I first really got to know them when I lived in Germany. My host family taught me how to cook them slowly without browning and finish with cream and smoked salmon to serve over pasta – so so so good. I could eat the ‘sauce’ all by itself. Leeks appeared in my Farm Fresh to You box this week and I couldn’t have been more excited. My mind immediately went to that good ol’ pasta topping, but I also had other aspirations for what I could do with this green onion relative.

I love how leeks have that mild onion flavor and get really sweet when you cook them down. As I was perusing a variety of recipes, I found this leek and goat cheese tart that reminded me in the slightest of  caramelized onion flatbread and I was even more excited that I would be able to use the remains of the goat cheese log from my birthday. I even labored over home-made crust since I don’t own the recommended food processor – though I must admit I have become somewhat of an expert at cutting in butter with my fingers after this past year of cooking adventures.

The end result of the time and love was an absolutely delicious, with the sweet leeks and sharp goat cheese balancing out each other just right. To give you some perspective, when I have left overs I usually eat them for 3 meals at the most… say a dinner, a lunch and another lunch or dinner. I ate this tart for about 4.5 meals: dinner, lunch (a sliver for breakfast too), dinner and lunch. I couldn’t keep it out of my mouth. You layer goat cheese and leek confit and cover the whole things with a milk/cream/egg mixture. It’s a bit remaniscent of a quiche, but less eggy and definitely still worth every bit. It would make a great appetizer, cut into bite size pieces too. I know Thanksgiving is tomorrow, but there are a slew of holiday parties right around the corner for which this would be a fantastic addition.

ALSO – After a year of blogging, I finally figured out how to take non-yellow photos in my kitchen! In honor of this finding, I’m happy to present to you “Leek and Goat Cheese Tart: A Photo Montage”:

Leek and Goat Cheese Tart:

CRUST

  • 4 tablespoons (or more) ice water
  • 3/4 teaspoon apple cider vinegar
  • 1 1/2 cups unbleached all purpose flour
  • 3/4 teaspoon salt
  • 1/2 cup (1 stick) plus 1 tablespoon chilled unsalted butter, cut into 1/2-inch cubes

FILLING

  • 1/2 cup whole milk
  • 1/2 cup heavy whipping cream
  • 1 large egg
  • 1 large egg yolk
  • 1/4 teaspoon salt
  • 1/2 cup crumbled goat cheesechèvre
  • 1-1 1/2 cups Leek Confit, depending on how many leeks you used *recipe below

Preparation:

CRUST

  • Combine 4 tablespoons ice water and cider vinegar in small bowl. Blend flour and salt in a bowl. Cut in butter with finger tips until mixture resembles coarse meal. Slowly add water-vinegar mixture, mixing only until moist clumps form. If dough seems dry, add ice water by teaspoonfuls.
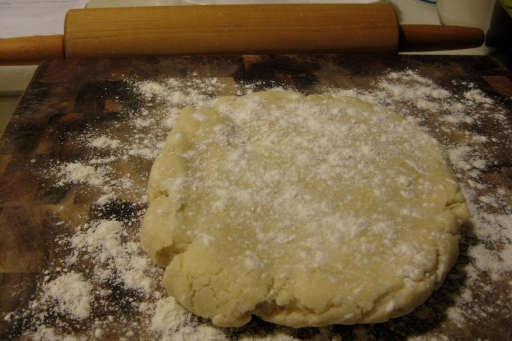
  • Gather dough into ball; flatten into disk. Wrap in plastic and refrigerate at least 2 hours. DO AHEAD Can be made 3 days ahead. Keep refrigerated. Allow dough to soften slightly at room temperature before rolling out.
  • Position rack in center of oven and preheat to 375°F. Roll dough out on lightly floured work surface to 12-inch round. Transfer to 9-inch-diameter tart pan. Press dough onto bottom and up sides. Fold in overhang and press to extend dough 1/2 inch above sides of pan. Line pan with foil and dried beans, pie weights or rice. Bake until dough looks dry and set, about 30 minutes. Remove foil and beans and continue to bake until crust is pale golden, 20 to 25 minutes longer. Remove from oven and cool while preparing filling.
FILLING

  • Whisk milk, cream, egg, egg yolk, and salt in medium bowl to blend. Sprinkle 1/4 cup cheese over bottom of warm crust; spread leek confit over and sprinkle with remaining cheese. Pour milk mixture over to fill to the top (you may not need all the liquid). Bake until filling has puffed, is golden in spots, and center looks set, 35 to 40 minutes. Transfer to rack; cool slightly. Serve warm or at room temperature.

*Leek Confit:

  • 1/4 cup (1/2 stick) unsalted butter
  • 3-4 large leeks (white and pale green parts only), halved lengthwise, cut crosswise into 1/4-inch-thick slices (about 5 cups)
  • 2 tablespoons water
  • 1/2 teaspoon salt

Preparation

  • Melt butter in large pot over medium-low heat. Add leeks; stir to coat. Stir in water and salt. Cover pot; reduce heat to low. Cook until leeks are tender, stirring often, about 25 minutes. Uncover and cook to evaporate excess water, 2 to 3 minutes. Serve warm. DO AHEAD Can be made 1 week ahead. Keep chilled. Rewarm before using.

The original bon appetit recipes here: confit & tart

Peaches with Goat Cheese and Prosciutto

My friend Beth had me over for a lovely impromptu dinner last night. She asked me to bring an appetizer and I immediately thought of cheese because of a recent trip to the SF Ferry Building (one of my favorite buildings in San Francisco). My co-worker and I took a lunch break there on Thursday so she could buy cheese and bread for her own dinner party. The cheeses we tasted were great, not to mention the people at Cowgirl Creamery are extremely helpful and are willing work with you until you get what I want. I couldn’t wait to go back and try it for myself.

When my number was called, I simply told the gal that I wanted a creamy goat cheese that would pair well with fruit, specifically peaches, and voila! She cuts open a fresh round for me, give me a sample and it was amazing – and on the first try too. It was super creamy, slightly sweet, and just a touch tangy. I also like that this shop has cheeses from all over. It’s not just Cowgirl classics like Mt. Tam, but a worldly selection to help you choose the best possible cheese for your liking.

Off to Farm Fresh product for some peaches and prosciutto (because Boccalone was closed!). And I had my fresh summer app ready to go in a matter of minutes and a short walk from the office.

I have now had this appetizer a couple of times, which were the inspiration. Version 1: pears + herbed goat + prosciutto. Version 2: peaches + plain goat + prosciutto + honey. Seeing as that we’re in the dead of summer, I went a little closer to version 2 sans honey b/c it’s a little more difficult to travel with.

amazing Hyku Goat cheese

Pit the fruit and cut into manageable pieces, I liked the smaller slices. Put  a bit of goat cheese in the middle. Wrap with a thin piece of prosciutto. End result: a sweet/savory/slightly tangy appetizer that is so seasonally appropriate!