A Quilt for Baby Costello

I have tried my hand at several different hobbies/crafts since starting my job at Craftsy, and now that it’s cold again, it’s been the perfect time to hole up and get cracking at quilting and sewing again. The fact that one of my very dear friends just had a baby was even more excuse to make something special.

This was my first bigger project and I’m really happy with how it turned out. I created the pattern myself and while most of it came together easily, I definitely had to rely on advice from quilting friends at work, and revisited the free (for everyone) Craftsy class that I initially learned from last winter, but it all came together in the end.

I’m definitely no expert, but here are just a few of the things I’ve found important:

  • Cutting your fabric correctly is SUPER important. It doesn’t matter that you know how to sew a 1/4″ seam if you are starting with the wrong size of fabric.
  • It’s ok to go slow, especially when doing the quilting. The biggest errors I made happened when I got going a little fast. It’s ok to take your time and in the end I think it results in a finer result.
  • Washing! Very elaborate quilts are often art pieces that you don’t wash really, let alone dry, but to make this baby quilt more comfy washed it and threw it in a hot dryer. It helps it poof a little bit and get softer.

I’m excited to take my own advice in my next quilt (ideally a full sized one) and I hope that despite its few flaws, my friend will actually use this quilt and hold onto it for a while.

IMG_6148IMG_6150IMG_6155

Needle Felted Baby Mobile

I have a new nephew. While he’s not technically my blood relative, the children of my best friend since the 6th grade are most definitely my niece and nephew. Colson was born last week and I was happy to finally send off his baby mobile to say welcome.

I took a needle felting class just before the holidays and it was so fun and easy that I just had to do it again. You start with colored roving (wool) and punch it with a serrated needle over and over to form the shapes you want. I didn’t have a pattern for this project, but put it together in the way that made the most sense and I love the way it turned out.

Even though I can’t be there right away to meet him, I’m happy to know that a little piece of me is there to watch over him.

IMG_5803IMG_7977IMG_5790

Gilded Oyster Shell Salt Cellars

Oh heeeey… Look! A blog post!

I know you’re excited. I’m excited too. Mostly because these oyster shell salt and pepper cellars are so dang cute – right?!

I saw them on Design Sponge forever ago, stored the idea away in the quite large part of my mind where I keep these sorts of things, and then I finally made them! I was with some girlfriends several Bachelor seasons ago, and was finally motivated to take some from the $1 oyster night we partook in. Then again, I rescued more shells from Tomales Bay after yet another day of indulgence, and voila: Gilded Oyster Shell Salt Cellars. The trip to Tomales Bay was part of a bachelorette weekend (a real one, not the show) so a set of these made a very convenient and oh so special present for the bride.

I’m just so excited about how they turned out. Sometimes other people’s DIY just never look the same when you do it, but these are awesome! I will definitely be setting out mine when I host dinner club on Sunday.

IMG_5551

These are SO easy. All you need are:

Steps:

  1. Procure oysters shells – Yup, be that person who hordes them away at the dinner table. The one who spends time trying to tip them over on the table to make sure they are stable. I promise, you won’t see (most) of those people again, so it’s ok.
  2. Rinse and dry shells
  3. Paint inside with liquid gold leaf. Let dry.
  4. Spray with shellac. Let dry.
  5. Load with salt and pepper.
  6. Accept the complements when they come rolling in.

See, I told you it was easy. I do love a maximum result from a minimal effort.

IMG_5556

Very Cute 2012 Calendar

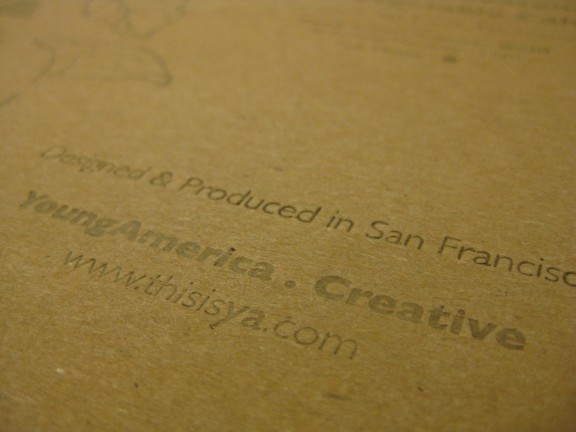
I took a walk through the Mission a couple weekends ago and came across this adorable calendar. I ended up ordering it directly from the graphic design studio, Young America Creative, and wanted to share it with you all. Isn’t it cute?? There is a page per month, each with a lovely seasonal design and a list of seasonal fruits and vegetables for the month. I am obsessed.

You can get yours here!

DIY: Monogrammed Note Cards

A couple of months ago I ran out of thank you cards. I’d been using just the basic one’s from one of my graduation stationery sets. Since then, I decided I’d like to get some multipurpose monogrammed stationary – I thought about getting some ordered, but they seemed terribly expensive for something that is so simple. At one of the holiday craft fairs I went to around the holidays I spotted a darling ‘E’ stamp and decided that I could very well monogram my own note cards.

These are perfect for thank you’s, recipes, or just a little note to say hi to someone. I found flat white cards and matching envelopes (though I suppose you could send them as post cards as well) at Paper Source and for $12.00 I have 25 elegant monogrammed cards.

What you need:

  • Stamp
  • Ink pad
  • Note Cards + Envelopes
  • A nice pen in matching ink
  • The nicest penmanship you can muster

Tips:

  • Keep it simple – it’s the best way to make your cards elegant
  • Practice the stamping and writing before stamping for real
  • Pick a stamp that feels like you!